When it’s time to replace your furnace, understanding the installation process can help you feel more prepared. In this blog, we’ll walk you through what to expect during your furnace installation and offer insight into how professionals manage the project to ensure everything goes smoothly.
1. Initial Consultation and Evaluation
Before the actual installation begins, you’ll have a consultation with your HVAC contractor. This is where you’ll discuss your heating needs, budget, and preferred furnace type. The contractor will evaluate your home, ensuring they recommend the right furnace size and model. In areas like Mississauga, ON, where winters can be quite cold, selecting a furnace that matches your home’s size and insulation levels is essential for efficient performance.
2. Removal of the Old Furnace
Once you’ve selected the furnace and set the installation date, the team will start by removing the old unit. This involves disconnecting the power, gas, and ventilation lines and properly disposing of the furnace. The removal process typically takes a few hours, depending on the condition of the existing system and any complications that may arise.
3. Preparing the Installation Area
After removing the old furnace, the installation team will prepare the space for the new furnace. This may involve cleaning the area, checking that all connections (such as gas lines and ductwork) are in good condition, and making necessary modifications to ensure the new unit fits perfectly. Your HVAC contractor must scrutinize everything to avoid leaks or inefficiencies later on.
4. Installing the New Furnace
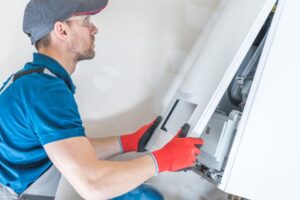
Next comes the actual installation of the new furnace. The technicians will place the furnace in the designated spot and connect it to the ductwork, gas lines, and electrical wiring. Modern furnaces often require specific configurations, so professionals will ensure everything is properly aligned for safe operation. The process also includes setting up the ventilation system to expel fumes safely from your home.
With furnace installation Mississauga, ON, contractors often account for local building codes and climate conditions, ensuring the installation meets all safety standards. Make sure to ask your HVAC company about any permits or inspections required by the city.
5. System Testing and Adjustments
Once the furnace is installed, the technicians will test the system to ensure it’s functioning correctly. They’ll check airflow, thermostat calibration, gas pressure, and other critical factors to ensure that the furnace operates efficiently. They may make adjustments to improve performance and reduce energy consumption. Testing also ensures that the unit is safe to use and free of leaks or issues.
6. Post-Installation Maintenance Tips
After the installation is complete, your contractor will provide guidance on maintaining your new furnace. This often includes information about changing air filters, setting up a regular maintenance schedule, and monitoring the system for any signs of trouble. Regular tune-ups will ensure your furnace lasts for years and continues to perform at its best.
Understanding the furnace installation process can make it easier to prepare for the day when technicians arrive at your home. By working with an experienced HVAC contractor, you can ensure a smooth installation and enjoy reliable heating throughout the colder months. A professional furnace installation ensures comfort, safety, and energy efficiency in your home.
Schedule your furnace installation with the pros at Peatson’s Heating and Air Conditioning Ltd.

